From the 2010 archives this vessel was turned from spalted sweetgum from north Georgia. It's approximately 11" in diameter and is turned cross grain (with the log chunk spinning end over end). Natural cracks were filled with black tinted epoxy and the rim was textured before finishing with lacquer.
Saturday, January 28, 2012
Friday, January 27, 2012
Wednesday, January 25, 2012
Manzanita Root Burls
Here's what's coming from Rick Urban in Flagler Beach...
When the fires were ravaging southern California these were some of the victims: manzanita root burls. I don't like to think about what they cost (including shipping) or the trouble involved in turning them, but they will yield something absolutely spectacular! Stay tuned.
Tuesday, January 24, 2012
Sunday, January 22, 2012
Tuesday, January 17, 2012
Wedding Gifts
From the Scrapbook - Appreciation
If you want to feel appreciated...
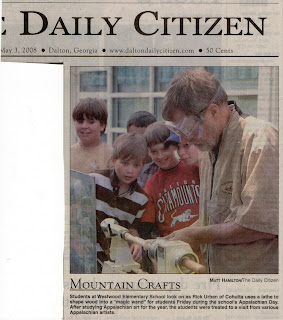
...demonstrate woodturning for some 6th and 7th graders. Look at their faces!
Monday, January 16, 2012
Small Boxes 101 (final part 3)
Time to finish those small boxes we left on the shelf.
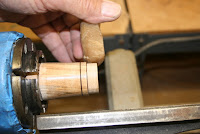
 Mount the bottom on the fixture sized for the opening. If it's too loose just shim it with a piece (or two) of paper towel.
When it's almost finished, remove the tail stock for complete access to the bottom for finishing. An unfinished bottom is a show stopper for anyone looking for quality in turned work.
Enjoy!
Sunday, January 15, 2012
Thursday, January 12, 2012
Tuesday, January 10, 2012
Sunday, January 8, 2012
Friday, January 6, 2012
Thursday, January 5, 2012
Shop Dogs
We're Rick's "shop dogs," and we approved this message!
http://www.rickurbanwoodturner.com/
http://www.urbanwoodworks.com/
Wednesday, January 4, 2012
Small Boxes 101 (part 2)
We left off with semifinished tops for our boxes.
Now we need to do the bottoms like we did the tops except the hole is 1/8" smaller than in the tops.
We mount the bottom in the chuck using the tenon we left for it. After trimming the top of the bottom to size it for a snug fit inside the top, we put the top in place and turn them as one so the form flows from top to bottom.
We add whatever decorations we want to the surface and finish. Sanding sealer followed by shellac based friction polish is a quick and easy finish for small projects like this.
The snug fit allows me access to the top for decoration and finishing.
A little bee's wax where top and bottom slide together,
... and we have a bunch of boxes needing their bottoms finished. We'll do that next time. http://www.rickurbanwoodturner.com/
http://www.urbanwoodworks.com/
Tuesday, January 3, 2012
Beach Bowls
Flagler Beach has one of the nicest beaches around with coquina sand that feels wonderful on your tired bare feet. I thought it only appropriate to make some "Beach Bowls" with the coquina sand. This one is red oak with a coarse coquina starfish inlaid with epoxy in the bottom. You can see more on my website.
 |
| Red Oak "Beach Bowl" with Coquina Starfish |
Small Boxes 101 (part 1)
Let's get started making some small boxes!
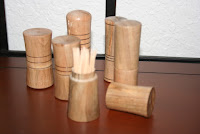
These will be boxes suitable for toothpicks, matches, or whatever of similar size. I'll be using blanks 1 1/2" x 2 1/2" because I happened to have a lot of blanks that size on hand.
 I start by drilling as many tops and bottoms as I need. I like 7/8" for the bottoms and 1" for the tops. That allows me to cut the bottoms with a tenon or shoulder to fit snugly into the 1" top while leaving the wall 1/16" thick.
Next I mount one of my 7/8" jamb chuck fixtures and a drilled bottom blank using the tailstock for safety. (See more about the fixtures in my earlier post at http://www.rickurbanwoodturner.blogspot.com/2012/01/tools-for-small-boxes.html ).
 Then I shape the bottom, cut to mark where the waste block will be parted (cut) from the top, and cut a tenon so the bottom can be held in the chuck jaws. I repeat this for the rest of the bottom blanks.
Next time we'll do the tops and almost finish the boxes.
Monday, January 2, 2012
Check for Nails!
I was leading a charmed life! I never found any nails in the wood I rescued. I never needed a metal detector until...
... a magnolia tree had nails and screws (33 of them) buried deep (6") below the bark from decades passed.
I ruined 2 chain saw chains before getting them all. (I was determined to win the battle.)
I'm older and (sometimes) smarter now. I have a metal detector, and I'm more alert for the tell tale "tick" "tick" "tick" that says I've encountered something different in what I'm turning.
Tools for Small Boxes
For these particular small boxes I use a drill press and forstner bits to drill the inside of top and bottom blanks. In this case I am using some 1 1/2" x 2 1/2" blanks, so my preferred sizes are 7/8" for the bottom and 1" for the top. That allows me a little wiggle room for the outside diameter, and I just have to size the bottom for a nice fit to the predrilled top. If I were only doing a small number it would be easier to drill them on the lathe, but the drill press is more efficient when doing a larger batch.
 I have also made some fixtures for mounting the predrilled blanks. These have a morse taper for the headstock and are also held by the jaws of the chuck seen in the picture. That makes it possible to make small adjustments in the mounting so they run true.
 I use a lot of different tools from time to time, but these work well for me for this project. The 1" spindle roughing gouge lets me round the blank and form the general shape quickly while the 3/8" bedan tool is great for peeling away the small sections of waste very quickly. There isn't a better tool than a skew chisel for leaving a clean final surface on this kind of object. This one is a 1" skew. The 1/16" parting tool separates the project from the waste without loosing too much of the stock.
 I have also made some fixtures for mounting the predrilled blanks. These have a morse taper for the headstock and are also held by the jaws of the chuck seen in the picture. That makes it possible to make small adjustments in the mounting so they run true.
 I use a lot of different tools from time to time, but these work well for me for this project. The 1" spindle roughing gouge lets me round the blank and form the general shape quickly while the 3/8" bedan tool is great for peeling away the small sections of waste very quickly. There isn't a better tool than a skew chisel for leaving a clean final surface on this kind of object. This one is a 1" skew. The 1/16" parting tool separates the project from the waste without loosing too much of the stock.
Come back soon,
Rick
Sunday, January 1, 2012
Turned Boxes
Subscribe to:
Posts (Atom)


